Sign Shops (Old): Difference between revisions
>PrlcklyWasTaken (Adding categories) |
>PrlcklyWasTaken (added somethin) |
||
| Line 1: | Line 1: | ||
With the economy plugin on the server, players can use regular signs to create shops that other players can use - avoiding the need to trade manually. This page is a step by step guide on how to create your own shop signs. | With the economy plugin on the server, players can use regular signs to create shops that other players can use - avoiding the need to trade manually. This page is a step by step guide on how to create your own shop signs. | ||
To find good shops, visit [[Nations with good Shops|this article]]. | |||
== Step 1 == | == Step 1 == | ||
Revision as of 21:32, 12 February 2020
With the economy plugin on the server, players can use regular signs to create shops that other players can use - avoiding the need to trade manually. This page is a step by step guide on how to create your own shop signs.
To find good shops, visit this article.
Step 1
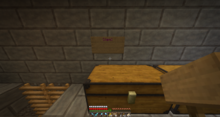
Place a sign on any wall. On the top line, write [item]. The text should appear purple as shown below.
Step 2
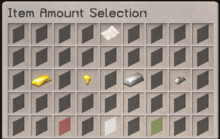
With the item you want to sell in your hand, right click on the sign. A window will appear called "Item Amount Selection". You can click on the Gold Ingot, Gold Nugget, Iron Ingot, and Iron Nugget to increase the number of items per sale by 64, 32, 5, and 1 respectively.
Once you have entered the desired amount, click the green glass in the bottom right corner. With this example, I am selling 64 Wheat, so I will click the Gold Ingot once and then the green glass.
Your sign will now look something like the image below, where the item and the amount are now displayed on the sign.
Step 3
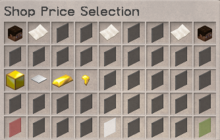
Now punch the sign once and another screen will appear called "[TNE] Action". You will see an Obsidian block and a piece of paper. Click the piece of paper and you will be brought to a screen called "Shop Price Selection". This screen is like the Item Amount Selection screen, but this time, you enter in the amount of gold that your item is going to cost. I want to sell my 64 wheat for 1 gold, so I will press the Gold Nugget, followed by the green glass.
Once you have entered the price of the item, your sign will now show the gold cost on the third line of the sign.
Step 4
The last thing you need to do is set the storage chest for the sign. This is the chest that the shop sign will look to take items out of. With my Wheat sign, if I don't have any wheat in the storage chest, then people won't be able to buy any items. To set the storage sign, right click on the sign, and then right click on the chest. You can store the chest anywhere you like, but you will only have 30 seconds to select the chest once you have right clicked on the sign.
Once you have done that, you will now be able to right click on the sign to open up the trade menu as shown below.
As you can see, I am selling 64 Wheat for 1 Gold Ingot. If I wanted to buy that item, all I would have to do is ensure that I have gold ingots in my inventory or Enderchest, and press the green glass to confirm the trade. The gold gets taken from the buyer's inventory/Enderchest and put into the seller's inventory, and the items get taken from the storage chest and placed into the buyer's inventory.
Simple!


